We've been battling stink bugs at our cabin. Brown marmarated stink bugs are an alien invasive species in Maryland, according to the University of Maryland Extension Service. My parents have really had a hard time with them--they even showed up in the Christmas decorations, inside sealed plastic totes!
We thought we wouldn't have much of a problem, since the cabin is not heated continuously, and we assumed the bugs were trying to find warmth. But last Friday, Pat came into the cabin and pulled his coat off the rocking chair (we leave some layers down at the cabin) and uncovered hundreds of them! We spent about an hour sweeping them up and shaking them off of things. We took off the slipcover and the bed clothes and shook them out, then swept them up and put them in a bucket. Pat transported the bucket of either dead or cold-torpor stink bugs up to a group of six very happy chickens! They put an end to our bug problem.
Hopefully next time, we won't find too many have crept back into the cabin.
This is one example of how a species can come into a new area and "take over." They were able to explode because they have left their natural predators behind in Asia. Why don't the birds just eat them? They probably did, but there were so many of them, and it is such a new food source, that they might not have been able to recognize them as a food source. OR, they may taste pretty bad (though our chickens didn't mind the taste!). Anyway, a predator may come to the forefront, something that has developed a taste for the stink bug, or their population may reach some kind of carrying capacity. But, it looks like they're here to stay. Sadly this is just one of the many alien invasive species that have come to North America and have upset the "natural balance," what is left of it.
Chronicling the life and experiences of two people who attempt to "opt out" of the average existence. Share our journey towards self-sufficiency.
Sunday, December 12, 2010
Thursday, November 25, 2010
Thanksgiving
This year we had my parents over for Thanksgiving dinner at our house--our real house, not our cabin (maybe one day!). We wanted to get a local, farm-raised turkey from a local farmer but that didn't work out too well. Pat got in touch with someone who sells turkeys in the local farmers market, but the farmer waited until Monday to get back to him. And then it was just a mass email saying they had birds for sale. Well, by then we had already gotten ours from my mom--she shops at one of those grocery stores where you rack up points and then can redeem them for a turkey, ham or lasagna for free. So we got our (non-local) turkey for free, courtesy of my mom! I still consider that working without our mantra of keeping things simple.
I have to say that this type of behavior among organic growers is not uncommon. I have noticed an attitude that some CSA growers and organic farmers have...that is sort of like snobbery. They produce it so you have to buy it right? It is organic so you want it right? It doesn't matter if the product is sub-par or the method is sloppy or the transaction is not enjoyable. Folks, just because you're organic doesn't mean you don't need to also be a good businessperson. I find it insulting. As if you don't have a choice, they're the local farmer so you HAVE to use them...not true. Demand a good product.
Pat de-boned the turkey, a la Julia Child, and gave it a dry-rub marinade. Before we plan to cook it he'll brush it with Wegman's basting oil which is infused with garlic and herbs. Then he'll brush it with maple syrup just before it is done baking to give it a golden color. It is going to be stuffed with stuffing made from his homemade bread too. That way you cut it like a roulade with no bones in the way and get stuffing with every slice.
Our free turkey is just about the only thing that came from a store though. We will have our potatoes, mashed; our green beans, sauteed; our butternut squash, in soup form and pie form; cherries we picked ourselves in the pie...the only things we didn't grow in our menu are some broccoli and some beets that didn't grow well for us this year.
I plan on taking some pictures so I'll post them later.
Give thanks for the blessings in your life, the people you love and whom love you, and the pets who make your life happy. I know I do!
Monday, November 15, 2010
Wood stove
We have been spending chilly weekends at the cabin working on shingles and visiting family. We have been putting the cedar shakes on the front side. Pat and I did most of it except for the very top rows where we would have to cut each one to the correct length. We'll wait till we have the chop-saw to do that. But it is looking like a real cabin. I love the colors of the painted trim and the cedar shakes.
We had a wonderful soup supper at an aunt's house. I made roasted butternut squash soup. It is a Martha Stewart recipe! It is a super-easy recipe, but takes a little bit of time to roast the squash (40 min). Cut a butternut squash in half, tuck 4 sprigs of thyme and four unpeeled cloves of garlic into the cavity and lay it face down. Bake for 40 min. When cool, scoop out flesh and peel garlic, discard the thyme. Process in food processor with about one cup of stock (I used duck stock). Transfer to a saucepan, add enough stock to get desired consistency (maybe 1-2 more cups), season with salt & pepper. I love this photo because the color contrasts so nicely with my grandmother's crock.
We have been keeping the chill out with our little wood stove. It is a Jotul wood stove, a Norwegian brand, that is about circa 1960 or 70. Apparently, they are made to last. There is info on the internet on this model and people who have them keep them running forever! We have put some money into it--we had to get the heat shields on the sides and bottom replaced because they had cracked. It is just a little thing, but it heats up the cabin nicely. The pooches love it! Maggie had her belly facing it the first night we used it. There is a cool relief picture of lumberjacks on the side. Pat scrubbed it with wire brushes and gave it a coat of stove black--wow, what a difference!
Sunday, October 31, 2010
Good night garden
Today we pretty much put the garden to bed. We had already laid down tarps to help kill the weeds/grass about a month ago. Then a few weeks ago Pat tilled up the ground where we had laid the tarps (the tarps didn't really kill the grass, but it kind of knocked it back some. Would have worked better in the springtime.
This weekend we spread a mixture of winter and annual rye to act as a cover crop in the tilled area. We tried to use Earthway seeders, but the seed was just too fine and it created "flour" instead. So Pat used the broadcast seeder and I lightly raked it in.
Then we planted garlic. We set aside part of the tilled earth for the garlic patch. We had a lot of seed garlic saved from this summer's crop. We set aside the biggest, best heads to plant for next season. This was the 2nd year we had set aside seed garlic. We didn't have quite enough, so we supplemented with store-bought garlic. Altogether we planted approx. 180 cloves of our saved seed, and 60 of the store bought. We'll compare them next year to see if there is any difference. To plant the garlic, Pat turned the soil with a shovel, then we levelled it off and raked it smooth. Next, Pat made a furrow with a hoe and I sprinkled in some bone meal. We read that calcium is good for garlic so we added that supplement. We planted the garlic 8" apart, then covered the furrow up with about 4" of soil. Finally, we piled straw on top to make a thick mulch. You almost can't mulch garlic too much.
We have some seed garlic left over, and a lot in the basement still. So we're going to try to freeze the cloves and see how it does. We ended up loosing some of our garlic over the winter to rot, so hopefully that does not happen this year.
There are still some peppers growing and the tomatoes are dead yet. We left them for Dad to pick what he wants. But pretty much that is it...the garden is ready for its long winter nap.
This weekend we spread a mixture of winter and annual rye to act as a cover crop in the tilled area. We tried to use Earthway seeders, but the seed was just too fine and it created "flour" instead. So Pat used the broadcast seeder and I lightly raked it in.
This past summer's garlic--today's seed source |
We have some seed garlic left over, and a lot in the basement still. So we're going to try to freeze the cloves and see how it does. We ended up loosing some of our garlic over the winter to rot, so hopefully that does not happen this year.
There are still some peppers growing and the tomatoes are dead yet. We left them for Dad to pick what he wants. But pretty much that is it...the garden is ready for its long winter nap.
Tuesday, October 19, 2010
Hot peppers
We have found that peppers are something that we grow really well in our garden. With the added help of the silver mulch, they did even better this year. We got loads of green and red bell peppers, and the little sweet orange peppers called "Yummy" (no kidding, that's their name!). We also got a lot of the hot chili peppers called "Red Rocket." They're really hot, but they have a good flavor. Last year we dried them and hung them in the pantry. We used whatever we needed by just pulling them off the strand and either clipping them or grinding them in the mortar and pestle.
This year we had so much, that even with strands hung up over the kitchen window, and the chandelier in the dining room, we still had leftovers.
So Pat decided to try drying them in the oven and then blenderize them with a little salt to help grind them up, to make crushed red pepper. It worked great! Now we have two whole containers of crushed red pepper flakes just waiting to be used in chili, soups, and refried beans! The funniest thing is that a while back, we helped my mom clean out her old spices from her spice cabinet and we kept some of the old containers. One was a glass crushed red pepper jar from circa 1970! Too funny!
Monday, October 18, 2010
Eggplant a-go-go
More eggplants leads to more creative eggplant recipes. Sorry, I don't have pics for these as they went pretty quickly! These recipes all came out of an old copy of the Victory Garden Cookbook, which I did a quick search for and is available from most every bookselling website out there. It looks a little out-dated but I am impressed with the recipes.
Eggplant "Grilled Cheese Sandwiches"
Lots of variations on this theme...
Open faced sandwiches: thickly slice eggplant (that has been salted and "wept" for 30 min), dredge eggplant slices in egg, then breadcrumbs and fry. Then top with cheese, tomatoes & cheese, or shrimp & cheese (etc.) and place under broiler until cheese starts to melt. (we've eaten this a number of times--really good)
Grilled Cheese Sandwich: Fry eggplant as above (thinly sliced), place cheese in between two pieces of eggplant. Cook in butter until cheese melts.
Broil eggplant instead of frying first (I haven't tried this yet...)
Eggplant-fish stew:
A little wierd, would be better without the fish and just be a jumble of veggies in a tomato-based casserole.
Sautee onions, peppers, garlic and herbs, add cubed eggplant (that has wept for 30 min). Add tomatoes and fish (or sans fish). Turn into a casserole dish, top with breadcrumbs and bake. Pretty tasty, even with the fish.
Eggplant roll-ups:
This was kind of a variation on the theme of eggplant parm.
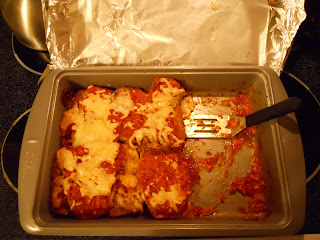
Place some tomato sauce in a baking dish. Salt thinly-sliced eggplant and let drain for 30 min (larger slices work better). Fry eggplant (dredged in egg then flour) then drain on tea towel. Mix veggie crumbles (it calls for sausage & hamburger, but I used veggie alternative), parm, parsley and egg. Spread the stuffing mix thinly on the fried eggplant. Roll up, tuck into sauced pan, open side down. Top with the rest of the sauce and parm & mozz. cheese. Bake first covered, then uncovered till golden. This was great! it was very filling and hearty and good with red wine.
Basically, I highly recommend this cookbook for those who want to try veggie-based recipes other than the normal tried and true ones. It has really come in handy. And thanks to Aunt Genie for sending it to us! :)
Saturday, October 16, 2010
Eggplant Parmesan
We have a glut of eggplant, so I fry them up and freeze them. This year I also made a lot of sauce and froze that too, rather than canning just tomatoes (we have plenty left from last year).
Just washed fresh eggplant from our garden. I've found the medium-sized ones work best. Too small and they may have a bitter taste, too big and the seeds will be too developed.
I peel and slice them, then dredge in flour, beaten egg & water, and then breadcrumbs mixed with salt, pepper, fresh parsley and parmesan cheese. You could also salt the eggplant slices first to draw out water. I get about four ready to go, so I don't have to stop and slice more while the oil is hot.
Then I fry up the eggplant in hot oil till it is golden brown on both sides. Drain on a papertowel or tea towel. Lay eggplant in the pan, overlapping slightly. Layer parm & mozzerella cheese, tomato sauce, ending with mozzerella on top.
Homemade tomato sauce is best. This is Fresh Tomato Puree from Julia Child's cookbook. Basically it is tomatos that have been put through a foodmill, onions, herbs salt and pepper. Super simple and delicious.
The finished product: it went so fast I didn't get to take a picture while it was whole!
Monday, October 4, 2010
Fall!
Oooh, I'm embarrased that I haven't written anything since August! Yikes! We have been in a holding pattern of weeding and harvesting tomatoes, eggplants, peppers and squash. I fry up the eggplants (most of them) and freeze them for eggplant parm during the winter, and I make sauce out of the tomatoes. So that has been taking most of my time. I halve the peppers and freeze them too. The squash should keep as-is throughout the winter.
Some things we can say from this year: the red plastic mulch seemed to work for the tomatoes, we had a good crop of them this year and they ripened in staggers. The silver plastic mulch worked for the eggplants and peppers. We had less of a problem with flea beetles this year. We didn't care much for the black paper biodegradable mulch. It breaks down too quickly, and dogs running through it pretty much destroy it! We will probably go back to using hay to mulch around the plants next year. It just seems to keep the weeds in check better than we can. The best tomato sauce recipe we've found is Julia Child's fresh tomato puree recipe. It is easy and tastes great. We also found out that if the basil plants get too big and out of control, just hack them back to the 2nd or 3rd bud and they'll come back nicely.
Last weekend we pulled out the fence and mowed down the back half of the garden. We put down tarps to use the stale seed bed method to kill weeds. Then in a couple of weeks, Pat will plow and/or disc the ground and plant some winter ground cover. Next year we plan on orienting the garden differently.
Thursday, August 12, 2010
Peas!
Peas in the sink, on the counter and on the stove. |
Snow peas in the sink |
After I blanch the peas, I lay them out on cookie sheets and freeze them overnight. |
Friday, July 16, 2010
Pat's bees
Pat opened the bee boxes as he usually does during the weekends. We have two hives--an old one and a new one. The old one was started last year, and the bees are docile and friendly. We almost never get stung by the old bees. They have a hive body (two big boxes for their brood, honey and pollen to keep the hive going) and two supers (smaller boxes of of honey which can be harvested). The new bees were started from a package this year, and have only a hive body and one super. These bees are not docile and friendly though--they are aggressive and will sting with little provocation. Pat can get away without wearing the bee suit for the old hive, but not the new one. The do not like to have their hive opened! Pat thinks that the difference is genetics. The old hive's queen was bred to be docile, and the new hive's may not have been. He thinks he may re-queen the hive with one from the old hive, if we can find a queen cell.
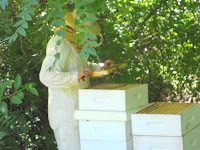
Pat examines a frame from a super of the old hive. Notice he doesn't have the gloves on.
He pulls out the frame to see how much honey the bees have stored. These top boxes (the supers) are for honey storage that is extra. We can take these and not hurt the colony during the winter.
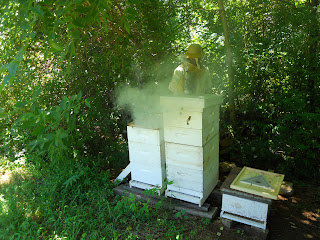
Pat smokes the bees in the old colony. The smoke makes the bees calm down. It makes them think there is a forest fire, and in a fire bees gorge themselves on honey. So when you puff smoke in the hive, they disappear into the hive and stick their heads into the comb. Just a little smoke keeps the old hive in check.
The photo is kind of blurry, but what it shows here is capped honey. This is what we want! The cells that look like they are glistening are uncapped honey. The bees bring back nectar and store it in the comb cells one dropful at a time until the cell is full. Then the worker bees fan their wings to create air circulation. They do this until they drive off most of the water in the nectar. When they have it right, they cap it for storage.
Pat estimates that we will get about 60 lbs of honey this year! This is only our 2nd year for bees. The triangular panel to the right in the picture is a bee escape. It is to allow the bees to get out from the super so that next weekend we can harvest.
Saturday, June 26, 2010
D-Day for Chickens
Well, we knew it was coming. The old chickens had lived out their useful life. I know, I know...as a vegetarian I should be opposed to any animal deaths. And I am opposed to animal cruelty and useless suffering. But I am also a realist and I understand that these are not wild animals that have been penned up cruelly, but are animals bred to provide eggs and meat. They wouldn't exist without human intervention. So when they started loosing feathers and their keels started showing out of their breasts, we knew it was time.
Mom, Dad, Pat and I all helped. It was a group effort. It was very humane. Mom even prayed before we began to thank the chickens for all the eggs they provided our family and for the yummy chicken soup that would be to come. With that, we began.
We set up on the driveway and in the garage. Pat had built a killing cone. Dad put the chicken head down inside the cone, pull its neck straight and slit its throat. It bled out into a trashcan filled with sawdust.
Then Dad dunked the chicken in 150 degree water, in a big pot on the camp stove in the garage. Once the feathers pulled off easily, he gave it to Mom and me and we plucked it.
Mom and I plucking chickens.
Then Pat gutted them, I helped too.
Dad, showing off one of the finished birds.
Final step, hose everything off and then spray with bleach-water. And pack the chickens in vacuum-sealed freezer bags.
They're not "oven-stuffers" but they will be good to use for stock or to pick off of the bone for soup.
Shingles!
We've got the shingles, finally, for the cabin. After much ado, and missed delivery dates, we drove to York and picked them up ourselves--all 1600 lbs of them! We got cedar shingles from Canada and they were supposed to be delivered to our farm, but things got mixed up and they kept being delayed. But here they are, safe and sound on our porch:
There was a little bit of learning curve, for me, to hang them. But once we got a system going it went pretty quick. They have a 5" overhang, and we snap a chalk line to line the bottom up against so they are nice and straight.
Most of the first side is done. We'll use some kind of stain to finish it once they are all up. I haven't decided yet if I want a colored stain to keep it the cedar color, or if we should just keep it clear and let it age naturally to a gray color.
Flycatcher family
We had a family of flycatchers raised on our porch! They watched us when we were sitting on the porch or having breakfast. Frank and Fiona Flycatcher would hang out on branches and chirp at us. They built their nest out of lichens and mosses up on the top beam of the porch roof. They finally fledged last weekend. here are some pics of their family
Here's their nest the first time we noticed it. There may have been eggs inside, but I didn't want to disturb them to find out.
Mother or father
Mother and father!
Kind of blurry, but this is the mother flying away after feeding the babies.
Believe it or not, there are five little birds up here. They are just about to fledge and they've been trying out their wings...to the detriment of their nest. Some of it is falling apart now.
Below is the mother feeding the babies, one has its mouth open. They were gone the next weekend.
Friday, June 18, 2010
Chamomile
I cut my chamomile this weekend. I have a patch of it by the pool, but it gets weedy-looking and Mom wanted to neaten things up before the big 4th of July party. So I cut it--which it needed badly any way. I cut the stalks, since she wanted to get rid of the plants themselves, but then I cut the flower heads off. I transported them back home and dried them for about a week on the food dehydrator. I love chamomile tea for evenings when you need to unwind a bit. I have asked for a chamomile rake for my birthday--it is a hand-held tool with teeth to pull off the heads and a basket to catch them. Would be a lot easier than cutting each one individually!
Sunday, June 13, 2010
Napa Cabbage
One of the most wonderful things we get early in the season is Napa cabbage. If you haven't had it before, think of a cross between regular cabbage and iceberg lettuce. It has that delicate, lacy texture, with the punch of cabbage. It makes great cole slaw, but it is most often used in Asian cooking. In fact, Pat's friend Carol from Taipei loves it and gets excited when she hears about it. We found a lot of new ways to cook it, but one of the best ways is in dumplings or pot-stickers. Shredded cabbage, carrot and red pepper with tofu and asian dressings folded together in a little purse of a wonton wrapper. Then steamed, and if you want, deep fried. Apparently Carol says that is how they do it in China but we just steamed ours.
Another great way to cook Napa cabbage is to make stir-fry. We found a recipe for stir-fried Napa cabbage with ginger and marinated tofu. Even though I'm a vegetarian, I am not a huge tofu fan, but this stuff is good! It is marinated then broiled and basted with the asian dressing. Then added to the Napa cabbage and ginger. We have made this quite a few times! (although i have to admit, the pic doesn't look all that appetizing)
Subscribe to:
Posts (Atom)