Saturday, June 26, 2010

D-Day for Chickens

Well, we knew it was coming.  The old chickens had lived out their useful life.  I know, I know...as a vegetarian I should be opposed to any animal deaths.  And I am opposed to animal cruelty and useless suffering.  But I am also a realist and I understand that these are not wild animals that have been penned up cruelly, but are animals bred to provide eggs and meat.  They wouldn't exist without human intervention.  So when they started loosing feathers and their keels started showing out of their breasts, we knew it was time.

Mom, Dad, Pat and I all helped.  It was a group effort.  It was very humane.  Mom even prayed before we began to thank the chickens for all the eggs they provided our family and for the yummy chicken soup that would be to come.  With that, we began.

We set up on the driveway and in the garage.  Pat had built a killing cone.  Dad put the chicken head down inside the cone, pull its neck straight and slit its throat.  It bled out into a trashcan filled with sawdust. 


Then Dad dunked the chicken in 150 degree water, in a big pot on the camp stove in the garage.  Once the feathers pulled off easily, he gave it to Mom and me and we plucked it.


Mom and I plucking chickens.


Then Pat gutted them, I helped too. 


Dad, showing off one of the finished birds.


Final step, hose everything off and then spray with bleach-water.  And pack the chickens in vacuum-sealed freezer bags.
  They're not "oven-stuffers" but they will be good to use for stock or to pick off of the bone for soup.
Shingles!

We've got the shingles, finally, for the cabin.  After much ado, and missed delivery dates, we drove to York and picked them up ourselves--all 1600 lbs of them!  We got cedar shingles from Canada and they were supposed to be delivered to our farm, but things got mixed up and they kept being delayed.  But here they are, safe and sound on our porch:

There was a little bit of learning curve, for me, to hang them.  But once we got a system going it went pretty quick.  They have a 5" overhang, and we snap a chalk line to line the bottom up against so they are nice and straight.  

We started on the side.  This is what we got done after one full day.  Not bad!

The tricky part is around the gables under the roof.  Lots of angles and takes some time.

Most of the first side is done.  We'll use some kind of stain to finish it once they are all up.  I haven't decided yet if I want a colored stain to keep it the cedar color, or if we should just keep it clear and let it age naturally to a gray color. 


Flycatcher family

We had a family of flycatchers raised on our porch!  They watched us when we were sitting on the porch or having breakfast.  Frank and Fiona Flycatcher would hang out on branches and chirp at us.  They built their nest out of lichens and mosses up on the top beam of the porch roof.  They finally fledged last weekend.  here are some pics of their family
Here's their nest the first time we noticed it.  There may have been eggs inside, but I didn't want to disturb them to find out.

Mother or father  
Mother and father!


Kind of blurry, but this is the mother flying away after feeding the babies.


Believe it or not, there are five little birds up here.  They are just about to fledge and they've been trying out their wings...to the detriment of their nest.  Some of it is falling apart now.


Below is the mother feeding the babies, one has its mouth open.  They were gone the next weekend. 


Friday, June 18, 2010

Chamomile

I cut my chamomile this weekend.  I have a patch of it by the pool, but it gets weedy-looking and Mom wanted to neaten things up before the big 4th of July party.  So I cut it--which it needed badly any way.  I cut the stalks, since she wanted to get rid of the plants themselves, but then I cut the flower heads off.  I transported them back home and dried them for about a week on the food dehydrator.  I love chamomile tea for evenings when you need to unwind a bit.  I have asked for a chamomile rake for my birthday--it is a hand-held tool with teeth to pull off the heads and a basket to catch them.  Would be a lot easier than cutting each one individually!

Sunday, June 13, 2010

Napa Cabbage

One of the most wonderful things we get early in the season is Napa cabbage.  If you haven't had it before, think of a cross between regular cabbage and iceberg lettuce.  It has that delicate, lacy texture, with the punch of cabbage.  It makes great cole slaw, but it is most often used in Asian cooking.  In fact, Pat's friend Carol from Taipei loves it and gets excited when she hears about it.  We found a lot of new ways to cook it, but one of the best ways is in dumplings or pot-stickers.  Shredded cabbage, carrot and red pepper with tofu and asian dressings folded together in a little purse of a wonton wrapper.  Then steamed, and if you want, deep fried.  Apparently Carol says that is how they do it in China but we just steamed ours.
Another great way to cook Napa cabbage is to make stir-fry.  We found a recipe for stir-fried Napa cabbage with ginger and marinated tofu.  Even though I'm a vegetarian, I am not a huge tofu fan, but this stuff is good!  It is marinated then broiled and basted with the asian dressing.  Then added to the Napa cabbage and ginger.  We have made this quite a few times!  (although i have to admit, the pic doesn't look all that appetizing)

Monday, May 17, 2010

Planting Corn

We start by adding some lime to the soil.  We had a soil test done and it said we should add some lime in this section.  So Pat very scientifically adds lime.


 Then Pat discs in the lime using Dad's tractor and the disc attachment.  That was a roadside find--$500 including delivery!

Then we seed the corn using an Earthway Seeder.  We have two--one we bought and one someone gave us to get rid of.  The old one works better than the new one.  The plastic is thicker and heavier and it rolls better.  The seeder works well for corn, spacing the evenly out and covering them all in one.

We planted three crops of corn--an early, middle and late crop.  We should have corn ready from July to September!


Red and Silver Plastic Mulch

May 2-May 8:  we install red and plastic mulch.  This is one of our little experiments.  This "mulch" (a term used to mean anything that covers the soil and keeps it in place and moist, not necessarily the bark-mulch we all know) comes in a large folded roll.  We started by weed wacking the cover crop and raking it up.  (this we placed on the garlic as a mulch)  Then we flame weeded the bed and tilled it under, raked it out, removing the large clumps.  Then we hoed out trenches on either side of the row.  We unrolled the plastic, pulled it tight and tucked it into the furrows, covering with soil as we went.  We did the red one first and silver second, so the silver looks tighter than the red.

Some literature says that red plastic is beneficial to tomatoes, because it reflects the wavelengths that tomatoes utilize best and absorb the wavelengths that it cannot use as well.  So we decided to try it and see if it made any different.  We also decided to try silver mulch for eggplants and peppers.  The silver is supposed to reflect more sunlight into the underside of the plants, so they get more sunlight.  Also there are no shady dark spots for flea beetles and other bugs to hang out in. 


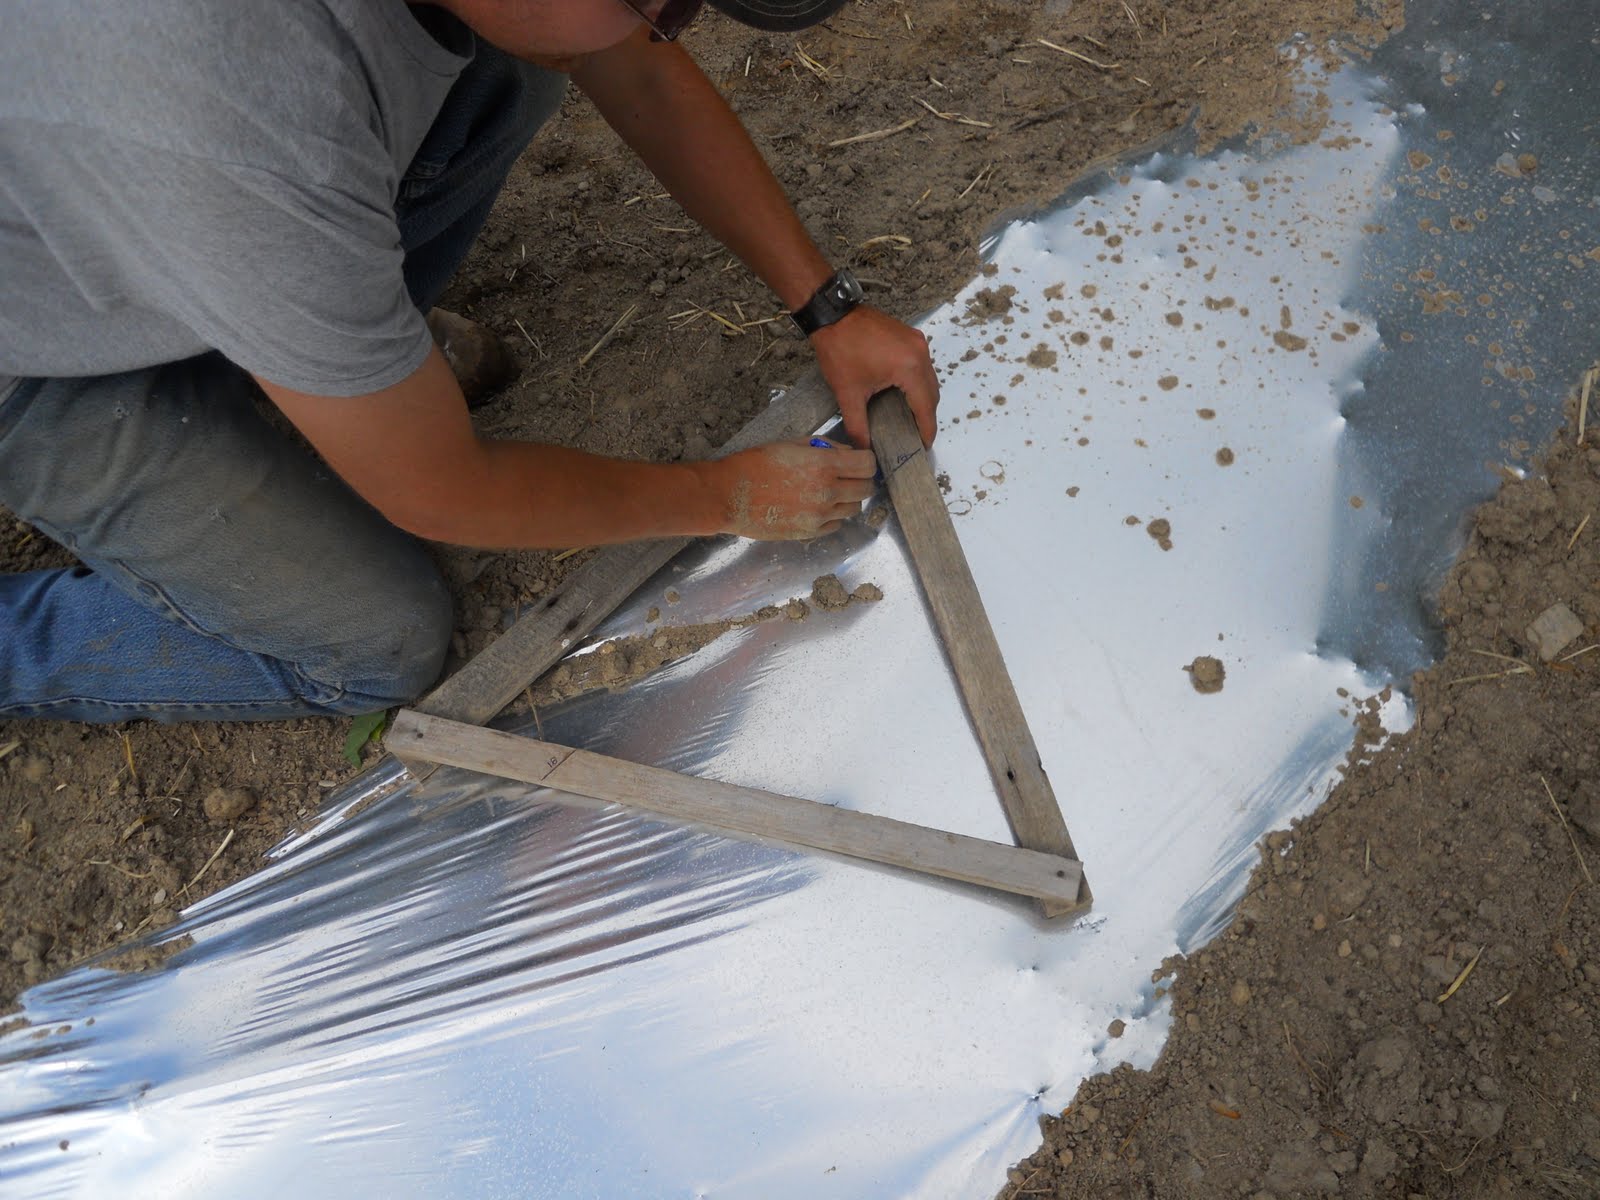
Pat uses the planting triangle to evenly space the peppers and eggplants 18" on the silver plastic.


The finished product.  Later we place row cover over the silver plastic.  We also put wire cages made of bent arcs of electrical wire fencing to cover the eggplants and peppers to protect them from the row cover.